This simple tutorial will help you create a Log In/Log Out menu link that will display a link to the login page when the user is not logged in and a link to log out when they are logged in.
This has now been incorporated into the plugin as a standard feature – all you need to do is add a login link to the menu and give it a custom class of “wpmem_loginout”. See documentation on this feature. This tutorial remains primarily for informational and educational purposes OR if you’d simply like to customize the login/out menu item.
This tutorial assumes you have already created a dedicated login page for your site. If you haven’t, create a new page and add the following shortcode to it:
[wpmem_form login]
Next, you’ll need to create your menu item for linking to the login page.
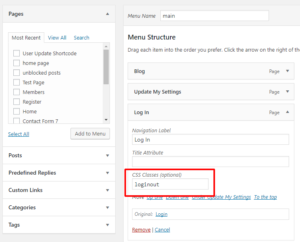
In the WP Admin panel, go to Appearance > Menus. Add a menu item like you normally would. In my case, I selected the already created login page from the “Pages” menu. Locate your page and click “Add to Menu”.
The label for your page is not critically important for this to work, but you probably want to make it something intuitive such as “Log In”. The part that is critical, however, is the CSS class given to the menu item because it needs to match the script used below.
To add the CSS class, open the menu item and under the “CSS Classes” heading, insert “loginout” (see screenshot).
You can customize the class name as needed, but keep in mind that the code snippet will also need to match.
Be sure to click “Save Menu” to save your changes.
So far, this should be fairly simple. All we’ve done is add a menu item to link to our login page. There’s nothing fancy about that. Now for the magical part.
We are going to add a little bit of jQuery to our site to change this menu item when the user is logged in. jQuery has a number of manipulation methods that are very handy. We will use the jQuery .html method which allows us to target the custom class we added to our menu item (.loginout) and change the HTML in that tag.
Copy and following code snippet and add it to your theme’s functions.php file:
[snippet slug=login-out-jquery-menu-item lang=php]
That’s really all you need to do. Test it out to see how it works.
For those that want to learn a little more, I’ll explain what’s going on in the code snippet.
First, it hooks to the wp_footer action. This action allows us to write our custom jQuery script to the document footer. JavaScript can be added in a number of places, but personally, I like things that manipulate the DOM (Document Object Model) to come in the footer. That way the document (DOM) has fully loaded and is ready for our script.
The next thing is that we wrap the process in a conditional test to see if the user is logged in or not. If they are not logged in, there’s no need to add anything as our script is intended to change the login link to be “Log Out” if the user is logged in. So we test for login state.
If the user is logged in, then we’ll add our link. The link is generated using WP’s add_query_arg() function and adds the WP-Members action “a” parameter with the value “logout”. Since WP-Members has a filter hook for custom logout links, I’ve applied that filter here.
Lastly, the jQuery script is added. This uses jQuery().html to change the Log In link to our Log Out link/text. This is done on the .loginout custom class we added in our menu.
